
What is the calibration process of Tuning Fork Level Sensors?
Leave a message

Hey there! As a supplier of Tuning Fork Level Sensors, I often get asked about the calibration process of these nifty devices. So, let's dive right into it and break down what the calibration process of Tuning Fork Level Sensors is all about.
What are Tuning Fork Level Sensors Anyway?
Before we jump into the calibration process, let's quickly go over what Tuning Fork Level Sensors are. These sensors work on the principle of vibration. The tuning fork vibrates at its natural frequency when it's in air. But when it comes into contact with a liquid or solid material, the vibration frequency changes. This change in frequency is then detected and used to determine the level of the substance. They're super useful in a bunch of industries, from food and beverage to chemicals and wastewater treatment.
Why is Calibration Necessary?
Calibration is like giving your Tuning Fork Level Sensor a tune - up. Over time, factors like temperature changes, mechanical wear, and electrical interference can throw off the sensor's accuracy. By calibrating the sensor, we ensure that it gives reliable and accurate readings. This is crucial because inaccurate level measurements can lead to all sorts of problems, like over - filling or under - filling of tanks, which can be costly and even dangerous in some cases.
The Calibration Process
Step 1: Preparation
First things first, you wanna make sure you've got all the right tools and equipment. You'll need a power supply that meets the sensor's requirements, a frequency meter to measure the vibration frequency of the tuning fork, and a calibration menu or software if your sensor is equipped with it.
It's also important to clean the tuning fork really well. Any dirt, debris, or residue on the fork can affect its vibration and throw off the calibration. Use a soft brush and a mild cleaning solution recommended by the manufacturer. After cleaning, let the fork dry completely.


Step 2: Initial Setup
Once the sensor is clean and dry, install it in the testing area. Make sure it's properly mounted and aligned. You want to mimic the actual operating conditions as closely as possible. Connect the sensor to the power supply and the frequency meter. Turn on the power and let the sensor warm up for a few minutes so that it reaches a stable operating temperature.
Step 3: Measuring the Air Frequency
With the sensor in air (i.e., not in contact with the material whose level it's supposed to detect), use the frequency meter to measure the vibration frequency of the tuning fork. This is called the "air frequency" and it serves as a baseline for the calibration. Write this frequency down because you'll need it later.
Step 4: Adjusting the Threshold
Now, it's time to set the threshold level. This is the point at which the sensor will trigger an alarm or a control signal indicating that the level has reached a certain point. You can usually do this through the calibration menu or software.
We take into account the air frequency we measured earlier. Based on the properties of the material we're measuring (like its density and viscosity), we set the threshold frequency so that the sensor will accurately detect when the material reaches the fork. For example, if we're measuring a liquid with a high density, the frequency change when the fork is submerged will be more significant compared to a low - density liquid.
Step 5: Verification with the Material
After setting the threshold, it's time to test the sensor with the actual material. Slowly introduce the material into the area where the tuning fork is located until it reaches the fork. The frequency of the fork should change as expected. Compare the measured frequency with the threshold frequency you set earlier.
If the sensor doesn't trigger at the right time, you may need to adjust the threshold again. Keep making small adjustments and retesting until the sensor accurately detects the material level.
Step 6: Final Checks
Once you're satisfied with the calibration, perform some final checks. Check the repeatability of the sensor by repeating the process of introducing and removing the material a few times. The sensor should consistently trigger at the same level.
Also, check for any electrical interference. You can do this by using a multimeter to measure the electrical signals from the sensor. Any abnormal readings could indicate interference that needs to be addressed.
Types of Tuning Fork Level Sensors and Calibration
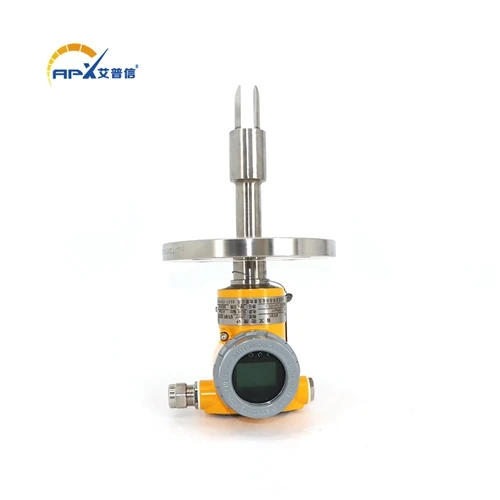
There are different types of Tuning Fork Level Sensors available in the market. For example, Level switch tuning fork type is commonly used for point - level detection. These are often designed for specific applications, like in explosive environments where safety is a top priority.
The calibration process for these types of sensors is generally similar to what we've described above, but there may be some additional considerations. For example, in explosive environments, you need to make sure that the calibration process is carried out in a way that doesn't create any ignition sources.
Another type is the Customized aluminum shell tuning fork horizontal switch. This type of sensor is often used in horizontal installations and may have different mounting and calibration requirements. For instance, proper alignment of the horizontal sensor is crucial to ensure accurate level detection.
And of course, we have the Level switch sensor. These sensors are used to detect when a level reaches a certain limit, whether it's a maximum or a minimum level. Calibration for these sensors is focused on accurately setting the limit levels.
Tips for a Successful Calibration
- Follow the Manufacturer's Instructions: Every Tuning Fork Level Sensor is a bit different, so always refer to the manufacturer's manual for specific calibration procedures and recommendations.
- Document Everything: Keep a record of all the calibration steps, including the air frequency, threshold settings, and test results. This documentation can be useful for future reference and for auditing purposes.
- Train Your Staff: If your team is responsible for calibrating the sensors, make sure they're well - trained. Proper training can prevent costly mistakes during the calibration process.
Wrapping It Up and Invitation to Purchase
So, that's the calibration process of Tuning Fork Level Sensors in a nutshell. As a supplier, we're committed to providing high - quality sensors that are easy to calibrate and maintain. Whether you're looking for a basic point - level sensor or a customized solution for a specific application, we've got you covered.
If you're in the market for Tuning Fork Level Sensors and want to have a chat about your requirements, or if you need more in - depth information about the calibration process, don't hesitate to reach out. We're here to help you find the perfect sensor for your needs and ensure that it's calibrated and working flawlessly.
References
- "Level Measurement Handbook", Publisher: XYZ Publishing
- Various manufacturer's documentation for Tuning Fork Level Sensors.