How to calibrate a capacitive fuel level sensor?
Leave a message
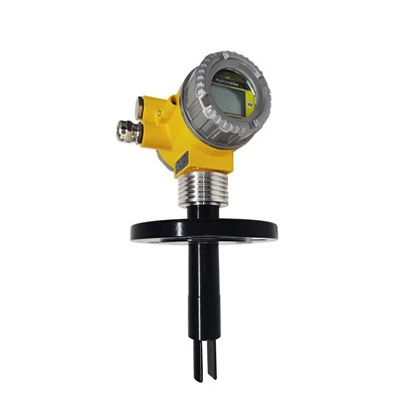
Hey there! I'm a supplier of Capacitive Fuel Level Sensors, and today I'm gonna walk you through how to calibrate these nifty devices. Capacitive fuel level sensors are pretty cool tech that can accurately measure the amount of fuel in a tank. They work based on the principle that the capacitance of a capacitor changes when it comes into contact with different dielectric materials, like fuel.
Why Calibration Matters
First off, let's talk about why calibration is so important. A well - calibrated capacitive fuel level sensor ensures accurate readings. If your sensor isn't calibrated correctly, you could end up with false readings. That means you might think you have more fuel than you actually do, which can leave you stranded on the road or cause your equipment to shut down unexpectedly. On the other hand, thinking you have less fuel than you really do can lead to unnecessary refueling, which is a waste of time and money.
Tools You'll Need
Before we start the calibration process, let's gather the tools you'll need. You'll need a multimeter to measure the capacitance values. Make sure it's a good quality one that can accurately measure small changes in capacitance. You'll also need a container that can hold the fuel you're going to use for calibration. It should be clean and made of a non - conductive material. And of course, you'll need some fuel. Use the same type of fuel that the sensor will be measuring in the actual application.
Pre - Calibration Checks
Before you start the calibration, do a few checks. First, make sure the sensor is installed correctly. It should be mounted vertically in the fuel tank and not touching the sides or bottom of the tank. Check the wiring to make sure there are no loose connections or damaged wires. Any issues with the installation or wiring can affect the calibration and the accuracy of the sensor.
Step - by - Step Calibration Process
Step 1: Zero Calibration
The first step in the calibration process is zero calibration. This is when you set the sensor to read zero when the tank is empty. Fill your calibration container with a small amount of fuel, just enough to cover the bottom of the container. Immerse the sensor in the fuel so that the sensing part of the sensor is completely covered. Use the multimeter to measure the capacitance of the sensor at this point. This value will be your zero reference value.
Now, use the calibration software or the adjustment screws on the sensor (depending on the model) to set the output of the sensor to zero when the measured capacitance is equal to the zero reference value. This tells the sensor that when it detects this capacitance value, the tank is empty.
Step 2: Full Calibration
Once you've completed the zero calibration, it's time for the full calibration. Fill the calibration container to the maximum level that the sensor is designed to measure. Again, immerse the sensor in the fuel and use the multimeter to measure the capacitance. This value will be your full reference value.
Use the calibration software or adjustment screws to set the output of the sensor to its maximum value (usually 100% or a specific voltage or current value depending on the sensor) when the measured capacitance is equal to the full reference value. This tells the sensor that when it detects this capacitance value, the tank is full.
Step 3: Intermediate Calibration
To make sure the sensor gives accurate readings across the entire range, you need to do intermediate calibration. Fill the calibration container to different levels between empty and full. For each level, measure the capacitance with the multimeter and record the corresponding output of the sensor. If the output doesn't match the expected value based on the level of fuel in the container, use the calibration software or adjustment screws to adjust the output.
Fine - Tuning
After you've completed the basic calibration steps, it's a good idea to do some fine - tuning. Fill the container to different levels and check the sensor readings multiple times. Make small adjustments to the calibration if necessary. This will help to ensure that the sensor is as accurate as possible.
Common Issues and Troubleshooting
During the calibration process, you might run into some issues. One common issue is inconsistent capacitance readings. This could be due to air bubbles in the fuel, a dirty sensor, or a problem with the multimeter. If you see air bubbles, gently tap the container to remove them. If the sensor is dirty, clean it carefully with a non - abrasive cleaner. And if you suspect a problem with the multimeter, test it with a known capacitance value.
Another issue could be that the sensor doesn't respond to changes in the capacitance. This could be due to a faulty sensor or a problem with the calibration software. If you think the sensor is faulty, contact the manufacturer for a replacement. If it's a software issue, try resetting the software and starting the calibration process again.
Using Calibrated Sensors in Real - World Applications
Once you've successfully calibrated your capacitive fuel level sensor, it's ready to be used in real - world applications. Whether it's in a car, a generator, or an industrial tank, the calibrated sensor will give you accurate readings of the fuel level.
But remember, the environment can also affect the performance of the sensor. Temperature changes can cause the fuel to expand or contract, which can affect the capacitance values. So, if you're using the sensor in an environment with large temperature variations, you might need to do periodic recalibration.


Related Products
If you're interested in other related products, we also offer a DPDT output RF level switch. It's a great option for applications where you need to detect the level of a liquid and have a reliable switching output. We also have a Capacitive sensor, used to measure the fuel level in the fuel tank which is very accurate and easy to install. And if you're looking for a sensor to measure water levels, we have a 4 - 20mA capacitive water level gauge that works great in a variety of applications.
Conclusion
Calibrating a capacitive fuel level sensor is not a difficult process if you follow the steps carefully. By doing so, you can ensure that your sensor gives accurate readings, which is crucial for the proper operation of your equipment. If you have any questions about the calibration process or need help with your capacitive fuel level sensor, don't hesitate to reach out. We're here to help you get the most out of your sensor. Whether you're a small business owner or a large industrial operator, accurate fuel level measurement is essential. So, if you're in the market for a new capacitive fuel level sensor or need to replace an existing one, we'd love to talk to you. Contact us to discuss your requirements and get a quote. We can help you find the right sensor for your application and provide all the support you need for calibration and installation.
References
- Capacitive Sensor Handbook - Manufacturer's Manual
- Multimeter User Guide
- Fuel Tank Installation and Maintenance Manual